Sunday, 9 March 2014

Tips for Growing Radishes

Companion Plants to Radishes: Climbing Beans, Carrots, Chervil, Corn, Cucumber, Lettuce, Marjoram, Nasturtiums,

Antagonistic Plants to Radishes:

Increase Crop Yields in a Small Space with Radishes - The nice thing about radishes is that they can be harvested in only a few weeks. This means you can plant them in one of your containers at the beginning of the season and have them harvested before planting something else in the same container - and you can do it again by planting radishes at the end of the season, after a container with some other vegetable has been harvested. Also, carrots benefit from being planted together with radishes as they sprout quickly and break the soil for the much more delicate carrot seedlings, making more of your carrots grow. Just be sure to harvest the radishes before they crowd out the carrots.
.
---------------------------------------------------------------------------------------------------------------
.
The Radish Journal
.
Radishes Sprouting on April 26 & 27, 2014
.
April 27, 2014 - My radishes took the outside of the time-frame stated on the package (4-6days) to come through the soil. I planted them on Saturday, April 19, and they just started poking through on Saturday, April 26. By the next day, you could really see them coming up, causing ruptures in the soil as they pushed through. I wasn't really surprised it took a little longer for them to come up. We've had nothing but cold, drizzly, wet days all week. A little bit of sun poked through yesterday and warmed things up, then presto! Radishes! Today was cool again, with periods of rain, but again some sun poked through and you can see the plants have already grown quite a bit in one day. I'll let them come up a bit more, then they will need to be thinned to be about 5cm (2in) apart from each other. 
.
---------------------------------------------------------------------------------------------------------------
.
May 1, 2014 - The great thinning of the radishes took place today. It says on the package to thin them out to be 5cm/2in apart, but I probably only spaced them out to be an inch or an inch and a half apart - we'll see how it goes... maybe I'll end up with Siamese radishes. This is something I always seem to struggle with out on the balcony - overcrowding. With a limited growing space, the more you can stuff into a pot, you think the more you will grow... however, it often turns out that putting too many plants into the same pot stunts growth and gives you smaller yields. Well, at least with radishes, they grow so fast that it's not much skin off your teeth if you have to plant a few more later on.
.
.
I also planted some radishes into my container with carrots. I feared I had planted the carrot seeds too deep and they might struggle to come up, so I brushed some soil off the top and planted the radishes on top to help break the soil for the carrots... and it worked great! Now I've got all kinds of little carrot sprouts coming up in between the radishes.

As well, even though I planted the second radishes a few days after the first ones, they sprouted much quicker and caught up to the other ones very fast. I think it all had to do with them both being exposed to hot weather at the same time, whereas the first seeds struggled through some cold and drizzly weather.   

Also, don't just pitch your radish clippings. Save and clean them, then add them to your salad, like I did after harvesting my first bit of Mesclun Mix Greens. Holy smokes, that stuff grows fast too!      
.
.
---------------------------------------------------------------------------------------------------------------
.
May 22, 2014
.
.
My radishes (above) look good - but I fear for them. I don't think I thinned them nearly well enough. They are actually overdue to be picked, having been out there for around a month while the package says they should be ready in three weeks, but I have left them in a bit longer because the actual radishes beneath are doing the pits. I've pulled up the odd one and there is nothing at all on the root, so I dug around a bit with my little shovel and found a few - but they are not the norm and are not very large. On the package it said to thin them about 2 inches between the plants, but I seen other people who were doing them about 1 inch apart. I fear I have fallen prey to the container-gardener's disease and planted too many, too close. I'll harvest them in a couple more days to see but I'm not holding my breath..
---------------------------------------------------------------------------------------------------------------
.
May 24, 2014
.
Well, like I said the other day, I was going to be pulling up the radishes but wasn't going to hold my breath. Good thing I didn't! This was just pathetic.

I had two full containers of radishes, one where I was using the radishes to break the soil for the carrots - and they destroyed my poor little carrots. I certainly won't be trying that "little trick" again. In fact, this whole harvesting of the radishes fiasco is so embarrassing that I hardly want to post the results, but I will because I want to show my mistakes as well as my successes.
.
.
.
There were hardly any radishes under there at all. Like I said in my last post, I suspect that I got too greedy and planted them too close together. I thinned them about an inch apart because I seen some other people who were doing it that close, but on the package, it says to thin them two inches apart. Lesson learned: listen to the package, dumb-ass. These were even left in the containers for more than a week longer than what the package recommended, and they still didn't pan out.
.
.
Yup, that's all that two pots produced. However, it is true that all clouds have a silver lining. Check out that one picture of about the only decent radish I pulled. That picture kicks butt! It belongs on a magazine cover!
.
.
Meh. What do you do when you live a shoe? I'll plant some more later this year, since they take such a short time to grow. Next time I will do better. 
.
-----------------------------------------------------------------------------------------------------------------------------
.
April 7, 2015
.
The strawberries have perked up and the radishes and kale have poked up nicely, so I guess that's the silver lining to this cloud.
.

Radishes (Left) and Kale (Right)
.
-----------------------------------------------------------------------------------------------------------------------------
.
April 22, 2015
.
The strawberries have started to flower, and the radishes are plugging along, although I thought they'd be bigger by now. Perhaps I planted them too early... I hope I don't get a repeat of the Great Radish Famine of 2014!
.

Strawberries (Left) and Radishes (Right)
.

Tips for Growing Carrots

Companion Plants to Carrots: Beans, Chives, Coriander/Dill, Cucumber, Marigold, Lettuce, Marjoram, Onions, Peas, Radish, Rosemary, Sage, Tomatoes

Antagonistic Plants to Carrots:

"Start sowing this cool-weather crop 3 weeks before the last expected frost; plant again every 2 to 3 weeks after that. Most cultivars take 70 to 80 days to mature, so sow your last planting 2 to 3 months before the first expected fall frost. In Zone 8 and warmer, plant carrots in fall or winter.

Put a pinch of about six seeds to the inch. They will take 1 to 3 weeks to sprout (they germinate more slowly in cold soil than in warm), so mix in a few quick-growing radish seeds to mark the rows. Cover with ¼ to ½ inch of screened compost, potting mix, or sand—a little more in warm, dry areas—to make it easier for the delicate seedlings to emerge. Water gently to avoid washing seeds away; keep the soil continuously moist for best germination.

Thin to 1 inch apart when the tops are 2 inches high, and be thorough, because crowded carrots will produce crooked roots. Thin again 2 weeks later to 3 to 4 inches apart." -- Carrots: A Growing Guide - Rodale's Organic Life

Optimal soil temperature: 7-30°C (45-85°F). Seeds take as long as 14-21 days to germinate. Because carrot seeds are tiny, they need to be sown shallowly. The trick is to keep the top-most layer of soil damp during the long germination period.

Increase Your Yields - If your carrots seem to grow in small patches rather than full rows, it's most likely because the soil has developed a crust which prevent the delicate seedlings from emerging. A simple way to solve this problem is to plant radishes with your carrots. The radishes only take around three weeks to grow and will sprout much sooner than the carrots, breaking the soil's crust for them. Make sure to harvest the radishes promptly though, or they may begin to crowd the carrots.

Crop Rotation - Carrots are susceptible to scab, as are many root plants, which is caused by the depletion of nutrients in the soil. Do not plant carrots in the same soil as potatoes were in during the previous two years, to allow for the soil to replenish itself.

Cover carrot crowns, which push up through the soil as they mature, with mulch or soil to prevent them from becoming green and bitter.
.
***
.
"There are two sources of Vitamin A: plant based (Carotenoids) and animal based (Retinol). It’s important to know the difference when watching your Vit. A intake, as overdosing on Retinol can have serious consequences to your health.

While Carotenoids are essential for eye health, immune function, and other areas of our health, overconsumption on a regular basis can lead to jaundice, nausea, loss of appetite, irritability, and vomiting. It is recommended that people take in 5000 IU of Vit. A from plant and animal sources daily.

Cooked Carrots have 26,572 IU in each cup." -- The Prepper Project: "What To Grow To Avoid Starvation and Malnutrition"
.
----------------------------------------------------------------------------------------------------------------------------
.
April 19, 2014
.
.
I'm really excited about the dwarf blueberry bush I bought for $25. That's it in the above top left picture. I hope it works out well. It's supposed to grow one to two feet high in a compact spherical mound. In the container on the above right I planted a row of cucumbers close to railing (I'm going to try and grow them upwards) and I also planted two rows of carrots in the same container. 
.
----------------------------------------------------------------------------------------------------------------------------
.
May 24, 2014
.
Well, like I said the other day, I was going to be pulling up the radishes but wasn't going to hold my breath. Good thing I didn't! This was just pathetic.
.

Left: Radishes Planted with Carrots (and Cucumbers along the edge) -- Right: Radishes Alone (Climbing Beans along the edge)
.
I had two full containers of radishes, one where I was using the radishes to break the soil for the carrots - and they destroyed my poor little carrots. I certainly won't be trying that "little trick" again. In fact, this whole harvesting of the radishes fiasco is so embarrassing that I hardly want to post the results, but I will because I want to show my mistakes as well as my successes.
. ----------------------------------------------------------------------------------------------------------------------------
.
June 19, 2014
.
Left: Carrots & Cucumbers - Right: Radishes & Climbing Beans
.
----------------------------------------------------------------------------------------------------------------------------
.
September 10, 2014
.
Well, I pulled up the carrots finally... didn't I tell you I took out the regular sized carrots mid-season and transplated them with baby carrots? No, well if you don't believe me, just have a look!
.
.
I knew they weren't going to work out - I'd pulled one or two of them up over the past couple of months to see how they were growing... and I seen they weren't growing well. I'm pretty sure it's the same problem that caused The Great Radish Famine of 2014: I didn't leave nearly enough spacing between the plants, which caused them to choke out the growth. Next year I will follow the spacing directions on the packages to a "T" for all of my plants. I've read elsewhere that this is one of the biggest problems with us sky-gardeners working with a limited space - you have the desire to cram as many plants into a pot as you possibly can, and in doing so you actually produce far less than you could have. Live and learn.
.
The carrots tasted fairly good though. I picked a cucumber and a few of the peppers, then added them to a salad for dinner.
.
.
-----------------------------------------------------------------------------------------------------------------------------
.
April 22, 2015 (Carrots were planted on February 26, 2015)
.
The carrots have come up well - and early. I left much more space between them this year, so hopefully they grow larger than they did last year. The two tomato plants seem to have survived the one night of exposure to the frost in the beginning of the month - it looks like they'll make it. 
.

Carrots (Left) and Tomatoes (Right)
.

Tips for Growing Kale

.
Red Russian Kale
Companion Plants to Kale: Beets, Celery, Onions, Potatoes

Antagonistic Plants to Kale: Beans, Strawberries, Tomatoes

A Cool Weather Plant - Kale is a cool weather plant and tastes best after it has been exposed to frost, but it can be grown in any season. It can tolerate temperatures as low as -7 degrees Celsius, but will turn bitter and tough in temperatures over 27 degrees Celsius. When planting in the cool season, keep the kale in full sun, but in hot temperatures, move the container to a place that gets partial shade. 
.
Planting & Spacing - To grow kale in a container, each plant must have at least 6 square inches of space. Kale prefers loamy soil with a pH between 5.5 to 6.8.

Caring for Kale - Keep the plants well watered and in moist soil, which will help make the leaves sweet and crisp. Apply fertilizer/compost every 6 to 8 weeks throughout the growing season.

Time until Harvest - Growth Time for Red Russian Kale, from transplanting to harvest, is between 40 and 60 days. Most other varieties of kale are ready to harvest between 55 to75 days.

How to Harvest Kale - Harvest individual leaves when the plants are eight to ten inches high, starting with the outside leaves first - or, harvest the entire plant by cutting the stocks two inches above the soil. New leaves will begin growing again in one to two weeks.

- If kale leaves are left too long before harvesting, they will become bitter and tough.

- Kale can stored in the fridge for up to a week by keeping it lightly moist in an unsealed plastic bag.
.
(Source: Kale: An Easy Beginner's Guide Growing, Gentle World)
.
***
.
Kale - One cup of fresh chopped kale provides 80.4 mg of vitamin C.
.
Dark Leafy Greens are an excellent source of plant based Vit. A. One cup of Cooked Kale has 17,707 IU.  Spinach, Collards, Turnip Greens, Dandelion Greens, Beet Greens, Swiss Chard and Pak Choi all have more than the recommended daily requirement in a single cup of cooked leafs. -- The Prepper Project: "What To Grow To Avoid Starvation and Malnutrition"
.
----------------------------------------------------------------------------------------------------------------------------
.
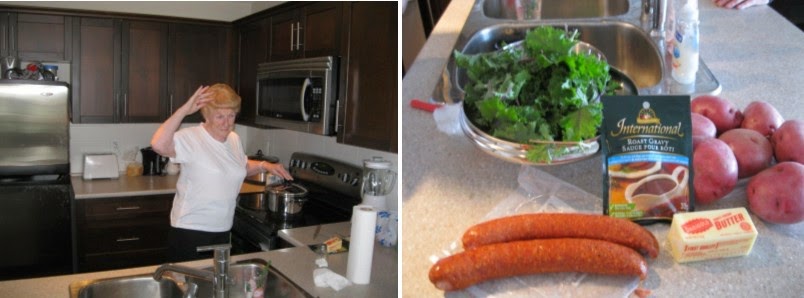
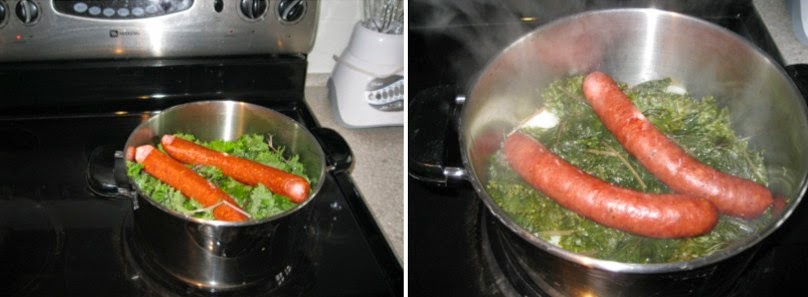
Borekole Recipe (Dutch Kale or Stamppot) (Click Pictures Below) 
.
http://balconyofeden.blogspot.ca/2014/06/borekole-recipe-dutch-kale-or-stamppot.html
(Click the above pictures for Dutch Kale/Borekole/Stamp-pot Recipe)
.
Red Kale Recipes -- Yummly
.
----------------------------------------------------------------------------------------------------------------------------
.
June 19, 2014
.
Well, the Balcony of Eden has been chugging along for about two months now and it was time to harvest the kale, with the leaves having turned dark in colour. We had been picking through it already for several weeks, adding it into salads and making two good-sized meals of Stamppot with the rest. Altogether we harvested 20 ounces of kale from that one container. I did a little bit of Googling and found that Kale sells for $1.57/bunch, which is about 130grams or 4 & 1/2 ounces - the next time I go to the grocery store I'll check the prices here in Chilliwack and then weigh it on my scale at home. Quite obviously, this was a financial disaster, since I bought the kale as six pre-grown sprouts which cost a total of $8.94 plus 12% tax = $10.01 expenses. Take off the $7.07 profit I made by growing it and I have a net loss of $2.94 for my efforts. Uh oh! This is the road to bankruptcy! Quite obviously, one must grow from seed or gardening is not cost-effective. At that rate, I won't even pay off the $12.84 (incl. tax) for the container and 30litre bag of soil in which I grew the kale in.
.
Heh, don't get me wrong - I'm not doing this to make money or to feed myself. This is more of an experiment than anything else, but I do want to monitor the expenses versus yields so I can become a more effective gardener. This was the first time I tried growing kale and it was a nice plant to grow - easy to care for; it looked wonderfully lush out on the balcony; and it tasted great. I'll plant kale again in the fall, since kale is one of those plants which can withstand frost and actually even tastes better after it has been exposed to frost. Of course, I will also grow it from seed next time, which will lower my expenses to around $2.00 - rather than the $10.01 I paid this time.
.
----------------------------------------------------------------------------------------------------------------------------
.
February 26, 2015
.
.
I also planted some kale in two of the large pots, hoping that they will sprout and grow early in the spring, so that by May I can harvest it and use the pots for a different crop during the summer. I'm not sure if it's too early in the year... perhaps we might get another frost, and perhaps not, but at least kale is a cool weather plant so I'm keeping my fingers crossed.
.
-----------------------------------------------------------------------------------------------------------------------------
.
April 7, 2015
.
The strawberries have perked up and the radishes and kale have poked up nicely, so I guess that's the silver lining to this cloud.
.

Radishes (Left) and Kale (Right)
.
-----------------------------------------------------------------------------------------------------------------------------
.
April 22, 2015
.
I planted a few of the pepper seedlings I had growing on the window sill, and as you can see, the kale is filling into those two pots nicely. In a week or two, I should start some more seedlings so I have something ready to go into those containers once the kale comes out.
.

Peppers (Left) and Kale (Right)
.

Winterize Your Apartment

.
http://past.theweathernetwork.com/your_weather/details/763/5447145/17/upload/1/786
Photo Credit: Ryan Dyck (Click pic for link)
Window Screens - Screens block the Winter's Sun. Even fine mesh screens can stop up to 20% of the sunlight that could enter through the windows and help to warm your apartment. Remove your screens in the winter. (Of course, it also goes without saying that you should open your drapes during the day to let the sunlight warm your suite while you are away at work).
.
Reverse Your Ceiling Fans - Most every ceiling fan has a little switch on the side that reverses the direction of the blades to clockwise, which pulls air up instead of pushing it down. If you flick the switch and run your fan on low during the winter months, it will gently pull the cooler air up from the "living level" where we are and push it up to the ceiling where the warmer air is, forcing that warm air back down along the walls to the "living level". This has the effect of using your warm air far more efficiently. Your thermostat will now keep the room at the same heat level while drawing on your heater less often.
.
.
Make a Door Snake For Your Entry Door - In an apartment building, one of the worst insulated areas is the entry door to your apartment from the building's internal hallways. Often times there is a significant air-gap on the bottom allowing the cold air from the hallway to continually seep into your suite day and night. The quickest way to solve this is to take a beach blanket and roll it up like a log to place along the bottom of the door. The problem with this is that when you open and close the door, it gets pushed out of the way. The solution to this problem is also very simple: Take some old socks and cut the toes out of them so they make a "tube," then pull your beach blanket through a few of them until a "log" is formed that can be placed along the bottom of the door. To attach the log to the door so that it stays put when you enter and leave, pick up some velcro strips from the dollar store and attach one half to the log and the other to the bottom of the door. When summer comes, simply pull the velcro'd log off the bottom of the door and store it in the closet until next winter.

Kitchen Tips

.
Freeze Ground Meat in Small Portions with a Chopstick -- LifeHacker - First put the food into a large freezer bag and press it out as flat as possible, eliminating air pockets. (Making it thin speeds up defrost time due to the increased surface area, and pressing out excess air guards against freezer burn.) Use a long chopstick or ruler to create divisions within the food, forming individual portions. This way when you freeze the entire bag, you'll be able to quickly break off just as much as you want to use, no more.
.
Baked Potato Quick Tip - To speed up time for cooking baked potatoes, press a clean aluminum nail through them to facilitate heat transfer during the cooking process.
.
Raspberry Tea - You can get more from your raspberry bush than just the fruit. Pick the leaves when they are fresh and green, then put them on a baking sheet and freeze. Once frozen, store them in a Ziploc bag until needed. Steep a handful in hot water for a light and caffeine free tea.  
.
How To Make Your Berries Last Longer - "Berries aren’t like apples and oranges - they go bad a lot faster, so getting them to last a little longer can be a huge money saver. Here’s what I do to get my berries to last longer:  I give them a little soak in a vinegar bath.  It’s one cup vinegar to 3 cups water.  It will kill any spores that might be on the berries and buy you some time.  Once they’ve soaked, I line my salad spinner with paper towels {to protect the berries} and give them a light spin to dry them a bit.  Finally, I put them in a container in the fridge {also lined with paper towel to absorb any remaining moisture} and leave the lid cracked a bit to get circulation to the berries." -- 100 Dollars a Month
.

Tips For Growing Strawberries

Companion Plants to Strawberries: Bush Beans, Borage, Brussel Sprouts, Chives, Marigold, Lettuce, Onions, Sage, Savory

Antagonistic Plants to Strawberries: Broccoli, Cabbage, Cauliflower

Storing Strawberry Plants - Once a strawberry plant breaks dormancy, each day it remains out of the ground will reduce future yields. After purchasing a new strawberry plant, if you can't plant it immediately you should place it in a plastic bag and keep it in your refrigerator to help it remain dormant.

Use Narrow Rows - Strawberries will grow better in narrow rows than in wide ones because plants in the middle rows will suffer from shading. Space the plants four inches apart in rows twelve inches wide. Mulch them and let flowers appear while removing all of the runners. The first year's crop should appear in around two months and next year's crop will be more fruitful. Strawberry plants grown this way produce heavier yields with larger berries for three to five years.

Protection from Birds - If birds are getting at your strawberries, get some mesh onion bags and open them at their seams, then sow them together to form a large net which will protect your plants when it is draped over them. 

Winterizing Your Strawberries - Put some mulch over your strawberries to help them through the winter, although, keep in mind that it is better to use too little mulch than too much. Thick mulch might cause water to sift downwards and into the soil, where it will freeze in cold weather and suffocate the plants.
.
How To Make Your Berries Last Longer - "Berries aren’t like apples and oranges, though, they go bad a lot faster, so getting them to last a little longer can be a huge money saver. Here’s what I do to get my berries to last longer:  I give them a little soak in a vinegar bath.  It’s one cup vinegar to 3 cups water.  It will kill any spores that might be on the berries and buy you some time.  Once they’ve soaked, I line my salad spinner with paper towels {to protect the berries} and give them a light spin to dry them a bit.  Finally, I put them in a container in the fridge {also lined with paper towel to absorb any remaining moisture} and leave the lid cracked a bit to get circulation to the berries." -- 100 Dollars a Month
.
Strawberries - One cup of sliced strawberries contains 98 mg of vitamin C. 
.
----------------------------------------------------------------------------------------------------------------------------
.
The Strawberry Journal
.
April 15, 2014
.
...I also bought one strawberry plant to fill in "the patch." I had three strawberry plants left over from last year in the one container, and it had room for one more. I actually got a lot of strawberries out of those three last year. I love strawberries, num num num, but regrettably I get an allergic reaction to them if I eat too many. Well, last year, there was always a few strawberries to pick every day and it didn't take more than a couple of weeks and I must have eaten too many. Wham! I broke out - just in time for guests from out of town to arrive too! Still, who can have a garden without strawberries? It would be an abomination! I'd like to grow more actually, and try to do other things with them than just pluck and eat them fresh, although that's pretty good too. They're fairly easy to grow and I could have more by getting a hanger or something that holds multiple pots and attaching it to one of the pillars on the side of the balcony. Another thing for next year's garden - these four will have to suffice for this year. .
----------------------------------------------------------------------------------------------------------------------------
.
June 19, 2014
.
...the strawberries (below) which are now cranking out abundant, tasty little berries for me, of which I sampled my first few only a couple of days ago. Mmmmm... you know, homegrown strawberries are certainly smaller than store-bought ones, which are sometimes almost as big as an apple, but the taste of the homegrown strawberries is one hundred times better. I cringe to think of what kinds of genetically modified tinkering goes into those huge store-bought strawberries.
.
Yummy Strawberries
.
----------------------------------------------------------------------------------------------------------------------------
.
Strawberries
April 7, 2015

The strawberries have perked up and the radishes and kale have poked up nicely, so I guess that's the silver lining to this cloud.
.


.
----------------------------------------------------------------------------------------------------------------------------
.
April 22, 2015
.
The strawberries have started to flower, and the radishes are plugging along, although I thought they'd be bigger by now. Perhaps I planted them too early... I hope I don't get a repeat of the Great Radish Famine of 2014!
.

Strawberries (Left) and Radishes (Right)
.

Saturday, 8 March 2014

Man with a Pan: Recipe List

.

.
Barbecue
Teriyaki Marinade for Barbecued Pork Tenderloin
.
Beef
Hamburgers and Onions in a Skillet (Paleo)
Slow Cooker Chilli (Paleo)
.
Beverages
Caesar Cocktail
Eggnog Recipes
Tequila Caesar
Tequila Sunrise 
Yukkaflux
.
Baking
Bread
Bread Baking Tips and Tricks
.
Breakfast
Bacon, Egg and Cheese Bowls
Bacon Pancakes (Paleo)
Bacon Stuffed Omelet
Carbonara Omelet with Left Over Spaghetti
Hamburger Stuffed Omelet
Lebanese Cauliflower Omelet (Paleo)
Maple Sausage Egg Biscuits
Sausage McMuffin Casserole
.
Candy/Snacks
Blueberry Kale Smoothie
Candied Orange Peel
Kale Chips
.
Dairy
Butter 
.
Misc
Dandelions - 16 Ways to Eat Dandelions 
Soapnut Laundry Soap
.
Paleo Recipes
Bacon Pancakes
Hamburgers and Onions in a Skillet
Lebanese Cauliflower Omelet
Slow Cooker Chilli 
.
Pasta
Baked Macaroni and Cheese with Ham
.
Sea Food
Parmesan (Ezekiel Bread) Popcorn Shrimp
.
Slow Cooker - Slow Cooker Recipes
French Dip Sandwiches in the Slow Cooker
Slow Cooker Chilli (Paleo)
.
Vegetables
Bacon Wrapped Potatoes
Blueberry Kale Smoothie
Borekole (Dutch Kale or Stamppot) 
Kale Chips
.
Wines
Blackberry Wine
Dandelion Wine
.
Ancient Recipes
American/European Recipes (1600-1960)
Ancient Roman Recipes
Assyrian Beef 
Food Timeline: Mesopotamia to Shakespeare
Mesopotamian Bread
Mesopotamian Raisin-Date Balls
Mesopotamian Raisin-Date Cake
Sumerian Beer
Sumerian Barley Flat Bread (See Picture)
Sumerian Date Cookies (See Picture)
.
Mom's Recipes
Boeren Jongens
Rhubarb Lemonade
Raisin Bread
Ginger Bread
Ginger Bread II
Brown Bread or Bran Muffins
Cinnamon Buns
Dutch Rye Bread
Mom's Rolls
White Bread (Basic Recipe)
Roggebrood (Pumpernickel Bread)
Apple Date Nut Cake
Butter Cake
Marshmallow Rolls
Pineapple Delight
Mix - Peel Cake
Olieballen - Dutch Doughnuts 
Shipwreck Casserole
Shipwreck Casserole II 
Stamp-pot (Boerkole, or Dutch Kale)

Sister's Recipes
.

Bacon, Cheese & Egg Bowls

I came across this recipe over at The Bachelor Chefs and decided to try it the other day. I'm glad I did because this a great tasting breakfast that is pretty easy to make.
.

.
Nutritional Info (Makes 6 bowls):
145 Calories, 8.1g Fat, 9.2g Carb, 8.2g Protein.

Cook Time:
25 min

Ingredients:
6 slices of bread
6 slices of bacon
1 bag of shredded cheddar cheese
Non-stick spray

What You’ll Need:
1 cupcake pan
1 large pan
.
.
Directions:

1). Preheat the oven to 400 degrees.

2).  Use a glass to punch circles out of the bread slices. Depending on the size of your glass and bread slices, you might be able to punch two circles per slice, like I did, and only need to use three slices of bread.


3). Spray nonstick spray into the cupcake craters in the pan and then press the bread into the cupcake pan. (*** See note at bottom of this page). 


4). Heat the frying pan on on high for about a minute. Add the 6 slices of bacon and cook for about 3 minutes, leaving it cooked, but pliable. Take off of heat and let the bacon cool for a minute.


5). Add bacon around the edges of the cupcake pan.


6). Add 1 pinch of cheese (about 1 tablespoon) into each “bowl”.


7). Place into the oven for about 5 minutes to melt the cheese. Take it out and set it next to where you’ll separate the egg yolks.

8). Separate the egg yolks from the whites. Add yolks to the bacon/bread/cheese bowls.


9). Place back into the oven for 8 minutes (yolks will be soft – if harder yolks are preferred, add a minute, 2 max).


10). Breakfast Time! (While mine tasted really good, they did not look as pretty as they did in the picture of the recipe when I first found it... so here is a picture of the prettier one for you to drool over.)

.
***Note: This was a pretty delicious little meal. It would be awesome with waffles on the side. The only complaint I had was the bread seemed a little dry after coming out of the oven. The next time I make this I will try lightly buttering the bread before pressing them into the cupcake pan.

Monday, 14 January 2013

Nasi Goreng

.
Recipe #1
Pork or chicken can be used with this dish. If chicken is used, cook it beforehand and cut it up. If pork is used, fry it in small pieces. Then fry two large finely chopped onions with 1/2 of a package of Boemboe nasi goreng. One package is 1 & 3/4 ounces. Prepare 2lbs of rice with water until tender but whole and not mushy. Combine the rice with the fried mixture and with one bottle of Ketjap benting. Season as desired with curry powder or/and Sambal Oelekas.
.
-------------------------------------------------------------------------------------------------------------------------------
.
Recipe #2 - Nasi Goreng, mix of vegetables and spices
Add yourself ingredients (4 people)
- 350g white rice
- 100g cubed bacon or ham
- Improba Wok Oil or vegetable oil
- 400g diced pork or chicken
- 450-500g finely chopped mixed vegetables (e.g. onion, carrot, paprika)
- 2 eggs
.
Preparation:
- Boil the rice as instructed on the packaging
- Soak the content of the sachet for 10min in 100ml of boiling water
- Fry the bacon in in 2tbs of oil on a high temperature and add the meat, fry until cooked through
- Stir fry the vegetables until they are "al dente"
- Add the soaked Nasi Goreng mix and the eggs mix all of it together until the egg has solidified.
- Mix it all with the boiled rice and fry it while continuously stirring it.
.
Serving Suggestion;
- Add Improba Ketjap Manis and Sambal Oelek to your taste. 
.